1.
In the GPL Projects toolbar, click on Create New Project.

2.
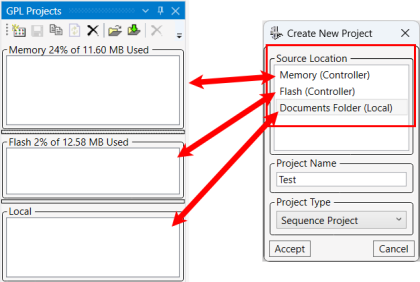
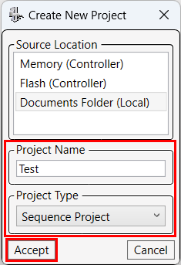
The Create New Project window will display. Select a Source Location window to put the new project: Memory, Flash, or Local.
3.
|
|
|
4.
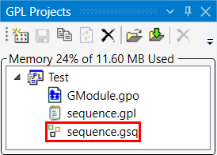
The Test project will contain three files:
- GModule.gpo
- sequence.gpl
- sequence.gsq
Double-click on sequence.gsq.
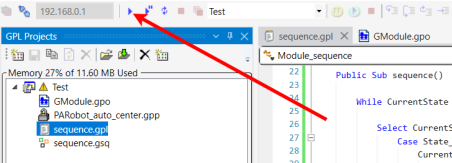
5.
The main sequence editor window will open.
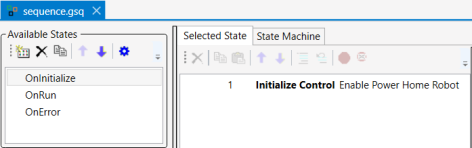
6.
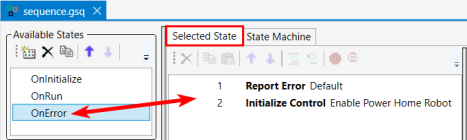
In the Available States window (shown here on the left), when you click on OnInitialize, OnRun, or OnError, the contents of each will display in the Selected State window.

7.
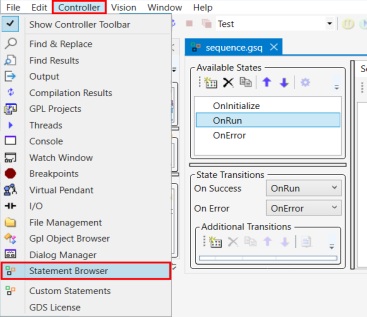
Click on the State Machine tab. A graphic representation of the Available States will display the states' sequence of activity.
In the example below, the black lines represent normal transitions, and the red lines indicate error transitions. If the activated OnInitialize state is OK, it will activate the OnRun state and run the program. If there is an error with OnItialize or OnRun, the OnError state will activate a corrective measure.

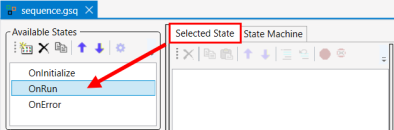
8.
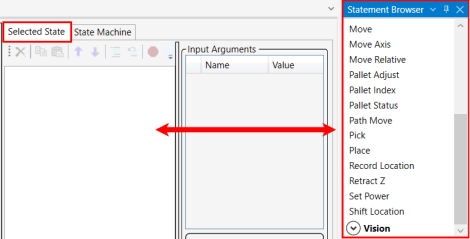
Click the Selected State tab and, in the Available States window, click the OnRun State. The Selected State window will be empty; you will build the program there.
9.
Open the Controller drop-down menu and select Statement Browser.
10.
The Statement Browser will display, shown here on the right side of the screen. It contains statements that can be dragged into the Selected State window to assemble a program. Statements in the Statement Browser are organized by category, shown in bold: Conditional, Data, General, Gripper, I/O, Motion, and Vision.
11.
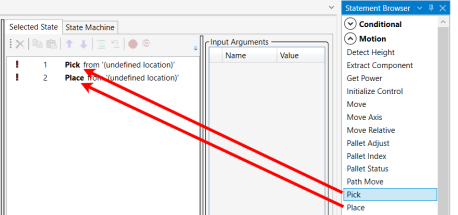
Click on the Pick statement and drag Pick from the Statement Browser (Motion category) to the Selected State window. Do the same thing for Place.
12.
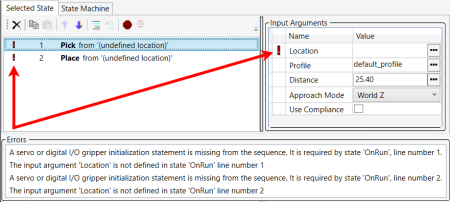
Add input arguments to each statement. Double-click on Pick to display its Input Arguments window.

13.
A red exclamation point indicates an error. The Error window at the bottom of the screen explains errors. One of the error messages displayed here is, "The input argument 'Location' is not defined in state 'OnRun' line number 1." That means a Location must be defined.
14.
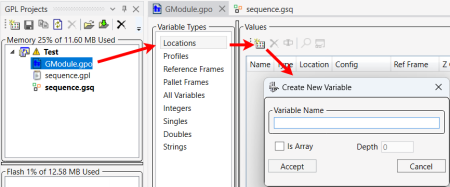
Define a location. In the Test project, double-click on the .gpo file. When the GPO editor windows display, select Locations, and in the Values window click on Create New Variable.
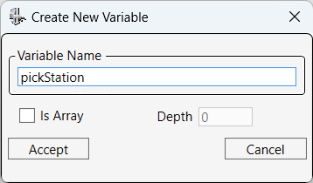
15.
Name the new variable, pickStation and click Accept.
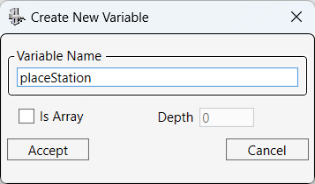
16.
Click on click on Create New Variable again, name the new variable placeStation, and click Accept.
17.
Variable data, such as the Location parameters, can be modified here. For information about how to teach the robot positions, see Editing a .gpo File file.

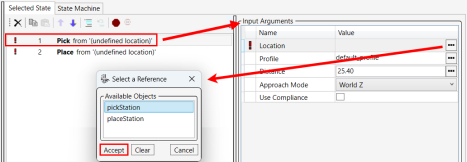
18.
Return to the sequence.gsq > Selected Statewindow.
- Select the Pick statement, which will display the Input Arguments window.
- In the Input Arguments window, click on the three dots to the right of Location to display the Select a Reference window. It will contain the newly created pickStation and placeStation Location variables.
- In the Select a Reference window, select pickStation.
- Click Accept.
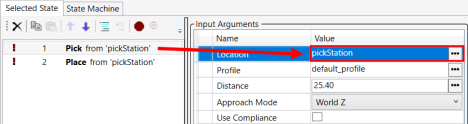
19.
The value will display in the Input Arguments > Location > Value field.
20.
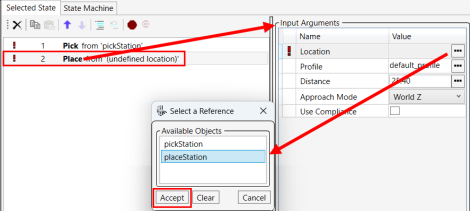
- Select the Place statement, which will display the Input Argumentswindow.
- In the Input Arguments window, click on the three dots to the right of Location to display the Select a Reference window.
- In the Select a Reference window, select placeStation.
- Click Accept.
21.
The Error messages indicate that a servo or digital I/O gripper initialization statement is missing.

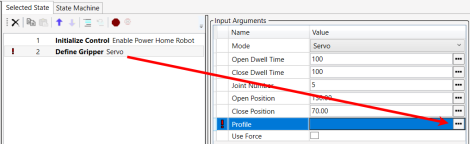
22.
- Since it is an initialization issue, in the Available States window, select OnInitialize.
- In the Statement Browser, expand the Gripper category, and drag Define Gripper to the Selected State window.
- Double-click on Define Gripper to display the Input Arguments. Click on the three dots to the right of Profile.
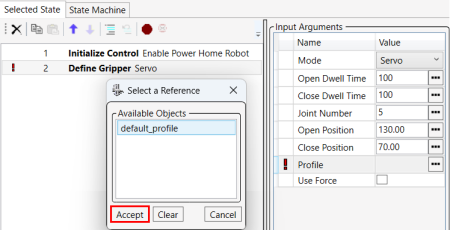
23.
The Select a Reference window displays, and it contains a default_profile. Select it, and click Accept.
24.
On the Available States window, click on the gear icon to generate the GPL code.
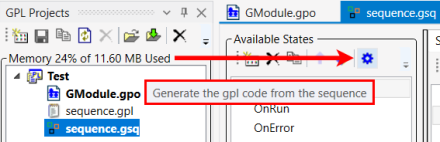
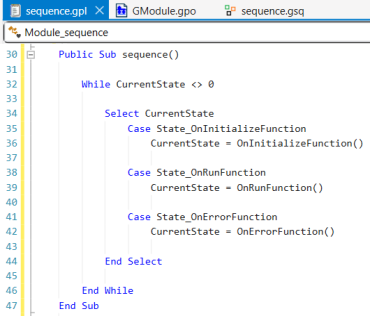
25.
The code will display.
26.
Save the project, and click Run.